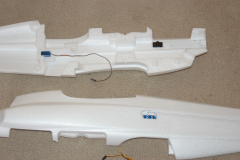


Opening the Gemini’s box I suspected I’d be in for a great building experience. While it looked like most Multiplex boxes from the outside, the inside proved different. Fitted inside the box was a large foam tray with each of the major components fitted neatly into a support structure. Needless to say, nothing was broken.
 |
 |
As I had already decided to use the colorful decals that came with the Gemini, I decided to do very little sanding. For the most part, the round multi-point vent marks on the foam were on the underside of the wings or inside the fuselage. I used just the lightest sanding with some 400 grid wet/dry sandpaper to knock of the single “dot” bumps that were on the outside of the fuselage and some other small parts. My experience with ELAPOR is that too much sanding results in the loss of the smooth foam texture required for good bonding with the decals.
As with many Multiplex planes, the servos mount in cavities on the outside of the fuselage with control “snakes” glued into grooves along the outside of the fuselage. I mounted these as called for in the instructions and still managed to get a drop of CA on the inner snake tube on one side. The result being one inner and outer snake bonded together. Not good, but not a catastrophe either. The servos went snuggly into place with light pressure and a drop of hot glue at the lugs. What did result in a trip to the hobby shop was the control rods which were equal length while the servo positions varied on the left and right side. As a result, the wire wouldn’t reach the control horn for the elevator. A length of music wire of the proper diameter solved that problem. I’ve got to say that after building seven different Multiplex aircraft kits, this is the first one with a part problem.
If you’ve built a Multiplex plane before the components mounted inside the fuselage will be familiar. The Gemini has two hatches on the top (one is the canopy assembly) so there are two sets of hatch clips. Interestingly they are different with one set being what I have on my earlier models and one being a little heavier duty with the hatch-side piece having an open circle on the end instead of a knob. Here is a link to the Gemini Manual if you'd like a more detailed view of the construction steps.
 |
 |
The instructions showed two sets of the same kind but the small parts kit differed. Another small annoyance in the small parts was that the familiar wing screw mounting disks came miss-mated. Since this is a biplane there are screws for the top and bottom wing. The wing attachment disks have a hole side and a snap side. In my case, I had 3 parts with holes and only one with the snaps. This made putting one of the pairs together a little more difficult as the threads still need to match to accept the wing bolt.
Once the interior parts were mounted, I sprayed a little kicker on a paper towel and gently rubbed one side of the fuselage opposite where I’d put CA on the corresponding side. I avoided kicker near the wing mounting disks and made sure both of them got started in there correct slots before allowing any other glued edge to touch where I’d applied kicker. With the wing mounting disks seated I quickly applied pressure to both fuselage sides ensuring alignment.
The next steps in the instructions are to complete the horizontal and vertical stabilizers. The challenge to this is assembling the tail wheel assembly. It’s not hard but you’ll want to read through the instructions and fit the pieces together a couple of times before taking out the glue. The tail wheel wire is missing the final bend so it will fit through the support/control horn assembly. I found the issue with this assembly is to make the bend with enough room to allow smooth rotation. Trying to bend too close to the assembly may result in binding if the arc of the bend hits the top of the assembly. The instructions call for you to glue it to the top of the control horn piece after carving out a slot for it at the bottom of the rudder. I found that by very carefully aligning the wire to ensure a the wheel and rudder are aligned, I was able to use a small drill bit to bore a hole in the middle of the width of the rudder and insert the tail wheel wire without carving out slots and filling it with CA. If you’ve ever built a GWS warbird, you’re familiar with the technique.
At this point the instructions call for application of decals on the wings. Do it now. The beautiful decals fit neatly on the model. I chose to put the wing decals on whole, over the wings and hinge line. After they were down, I used a metal ruler to describe a line down the middle of the hinge line. Using a Xacto knife I slit the decal using the edge of the ruler as a straight edge. This left a couple of millimeters on each side of the cut which allowed me to use the handle of a small paintbrush to press the decals against the inside edges of the wing and aileron respectively.
 |
 |
As for the bottom of the wing, the wonderful checkerboard pattern covers nearly the entire surface. That is done by cutting the decal into strips, sometimes one and sometimes two blocks wide. Don’t think of the decal as a one or two part application. Using it as 8 or 10 pieces you get a nearly full coverage pattern.
The rest of the structure assembly is typical Multiplex. Parts fit well so after dry-fitting, use CA and put them together. Control linkages use Multiplex quick connectors and pushrods with 90 degree bends at the servo side.
The motor mounting deserves some comment. Since I didn’t use the Multiplex power set, there was a little modification involved. The motor I chose was a Suppo 2814 6 turn motor. The first step was to loosen the grub screws and reverse the shaft. Following some advice from a message board, I used my drill press to apply smooth pressure to remove and then reverse the shaft. I reinstalled the collar and the grub screws and was good to go. The next step was to drill holes in the motor bulkhead. I used the cross mount that came with the motor as a template and located the new holes far enough from the pre-drilled holes to minimize weakening the bulkhead. Some have suggested ordering the mount for the Acromaster as it is larger and drilled for a larger motor. Seems like overkill to me. I used a sanding drum on my rotary tool to make a channel below the mount for the wires since they are now in the front after the shaft reversal. I had already prepared the ESC with Deans plugs and bullet connectors for the motor. I attached the motor wire and slid some heat shrink tubing over the connectors to keep them tight and prevent shorting. I tested the motor for proper rotation before I shrunk the tubing. Installation of the radio equipment is easy. There is lots of room inside. I placed a synthesized 72Mhz receiver under the canopy. The elevator and rudder servos are right there so there was no trouble connecting them. The lead from the ESC located under the front hatch was too short, but I planned to add an ESC cutoff switch so the extra wire spanned the shortfall with the switch mounted just above the side decal near the front of the canopy. Six-inch servo connectors are required for the aileron servo leads unless you plan to mount the receiver near the bottom surface. I used the deck just below the canopy so the extensions were required. With things hooked up and the propeller off, I programmed both the receiver for my preferred channel and the ESC as its default was “brake on.” I ran the antenna out the bottom and used several drops of hot glue to hold it in place down fuselage centerline, angling it to the left toward the tip of the horizontal stabilizer to keep it away from the tail wheel. With the battery installed I check the CG. As generally accepted on the discussion boards, I used 85 mm as the target instead of the 75mm listed in the instructions. With the battery in and the prop back on, it balanced perfectly. Now to see how she flies.


