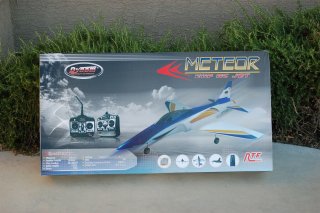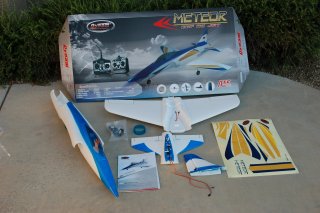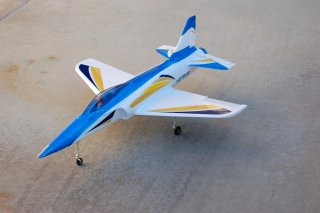
I was going through the Nitroplanes web site and noticed the Dynam Meteor was on sale, both the RTF and ARF versions. As I was looking for an EDF this seemed an interesting possibility. The Meteor is a Habu copy. It has a similar size and plan view. It is powered by a 70mm EDF running on a 4 cell lipo. Time to order! (Note: Nitroplanes has since stopped carrying the Meteor.)
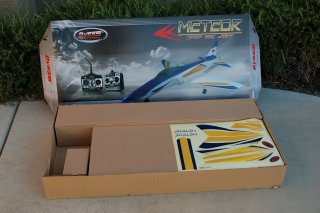
A couple of days later the big box showed up on my doorstep. The Meteor comes shipped in several boxes inside the shipping box and the colorful kit box. The kit box was marked for the RTF version, but alas, the radio and battery were not included in the ARF kit I had ordered. The fuselage was packed in a long narrow box and the wing and tail feathers were packed together in a large flat box. Finishing up the interior boxes was a small box with the gear, glue and other small parts.
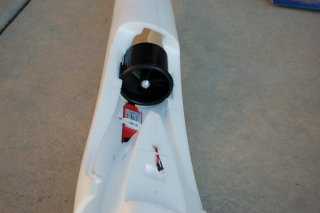
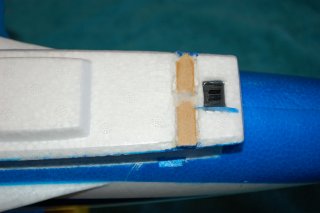
As I unpacked the parts I noticed that the wing had only a couple of small dents, some of which were eliminated by running hot water over the foam. The EPO foam is similar to the Elapor foam used in Multiplex models. That foam is known for its ability to "reinflate" using hot water-- often called making an Elapor soup. On the Meteor forum on RCGroups, some have complained that the fan unit that comes mounted in the fuselage banged around during shipping damaging the fuse. I didn't find that to be true and was pleased with the condition of the kit coming out of the box.
After reviewing the posts on RCGroups I went through the various connections and attachment points checking for security. Several have said attachment points were not glued in securely. I found the pocket that holds one of the servos in the tail was loose. It moved when the servo was actuated resulting in reduced control surface movement. That was the only loose item I found. I also found the fan was off center as others have described. I struggled for a few minutes to get the fan off the shaft. The screw was made from soft metal and the screwdriver I used started to tear up the slot. After thinking about it for a bit I decided to put the fan in the freezer to see whether the metals and plastic might contract at different rates. That is what happened. After about 20 minutes in the cold, the screw popped loose and the impeller was free. I centered the motor on the fan's mount and replaced the impeller. Good to go.
The big project for this ARF was adding retracts. I ordered servoless retracts from Hobby King. I struggled with the nose gear. It moved a couple of times but then quit. I ended up sending it back. The two main gear, by contrast, worked well. I referred to the instructions on the XPS web site on adding retracts to the Habu. The retracts are different so the parts XPS sells wouldn't work but the insights were helpful.
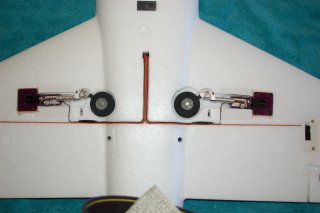
As the pictures show, I started by cutting through the attachment point on the Meteor rather than simply digging it out of the foam. Having a sense of the strut length, I moved the down point on the wing to have the wheel extend into the fuselage only a limited amount. As a result, the gear are wider apart than with the fixed gear. I also purchased spring-loaded struts to attach to the gear struts on the retracts themselves. I ended up cutting the retract struts about 20mm from the coil with 10mm of the length going inside the mounting sleeve of the add-on structs. The entire length is about 2cm longer than the fixed struts that came with the Meteor.
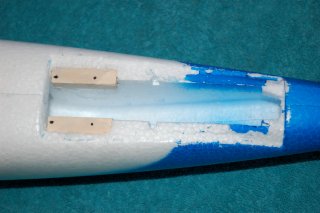
In digging out the foam for the retract assembly it was clear from the beginning that there would not be much room to play with. The retracts had a depth of 21mm and the wing at that point was only about 22mm. I decided that I'd mount the retracts with the mounting flanges on the wing's lower surface instead of flush. This gave me about 3mm of foam from the retract to the top wing surface. With such close tolerance, I was very careful when digging out the foam. I basically made dozens of very shallow cuts with my Xacto knife crisscrossing across the area to be cleared. The result was a small pile of foam "popcorn" as I dug down about 1mm at a time. No time to hurry!
Once the area was cleared, I expanded the top cutout on the sides to accept a 10mm square piece of basswood purchased at a craft store. Each piece was 34mm long and extended just a bit beyond the mounting flange on the retract. Had I planned to use the stock retract struts I would have made these pieces longer to disperse the shock of landing over a larger area. Since I was using the spring struts, I used a smaller piece. The wood pieces were glued in using white Gorilla glue which is a polyurethane glue. It was a good choice as the foam was rough and it expands or foams up as it dries.
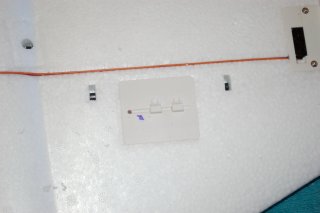
I used a sanding stone from the attachment kit for my rotary tool to clear out the foam for the wheel. That worked pretty slick. I have a flexible extension for the tool so it was easy to control the sanding. The end result was a smooth cavity for the wheel as shown. To finish the wing, I widened the tracks for the servo wires and did a small cutout where the servo extensions connected to the retract wires. I looked for a 3-way servo connector for the gear but couldn't find one. As a result, I ended up using a pair of y-connectors to connect the three retracts to the gear channel of the receiver.
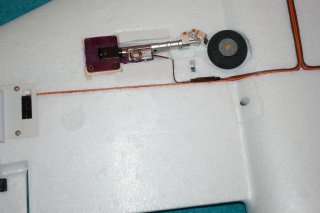
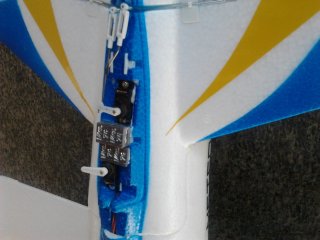
As noted, the nose gear retract went back to Hobby King. When the new one arrived, I mounted it using the same technique as the wings. First, I removed the servo mounting and front steering plate from the Meteor. I carefully used my Xacto knife to loosen the rest of the plastic nose assembly. I carefully slid the knife under the plastic plate and around the tabs that extended into the foam. I slowing wiggled the plate until is started loosening and was able to slowing pry it up. The glue was tight but flexible and it came up fairly clean taking very little of the foam with it. I cut out the edges of the cavity just enough to achieve a tight fit. Since the fuse was plenty deep, I mounted the basswood strips 2mm below the surface to allow the retract to fit flush. In this way, I could replace the plastic plate removed earlier leaving a nice clean finish. In this installation the wheel retracts forward.
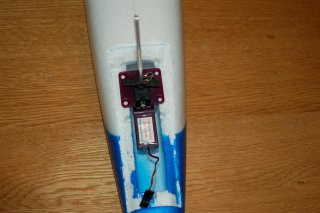
The Hobby King retracts allowed for steering using either an “L” shaped bar with a channel for the steering rod to slide in or thin wire for a “pull – pull” action from the servo arm. I wasn’t able to get the bar method to work consistently so went with the “pull-pull” method. I also needed a servo reverser so the nose gear and rudder moved together correctly. I got an inline reverse from Dionysus Design. The reverser simply installs between the servo and the receiver and reverses the control signals so the servo move opposite from what the receiver has commanded.
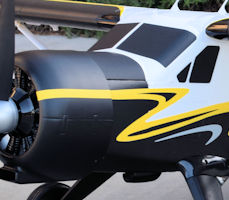
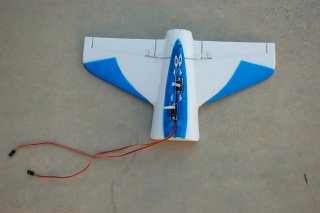
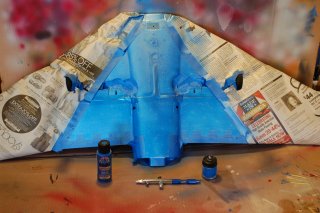
With the e-tracts mounted, I masked out a bird-shaped pattern on the bottom of the Meteor to provide some visual interest and ease orientation in flight.
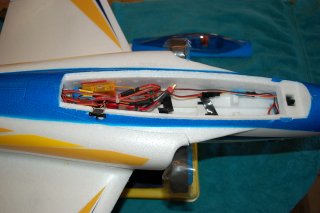
With the extra weight in the nose, I checked the CG and the Meteor proved to be nose heavy. I loosened the vertical stabilizer and slid 3 quarter-ounce pieces of Great Planes self-adhesive lead between the servos. That did the trick. The Meteor balanced perfectly.
As noted in the photo above, I also added a popsicle stick across the front underside of the canopy. I found that the catch on the front of the model was quite firm and that pulling on the foam was starting to rub off the paint and dent it. The solution was to sand out some small cut-outs on the fuselage and add the stick. This was the pressure needed to pull the canopy off was being applied to the stick and transferred across the foam structure, not just concentrated on the edges. It works well.
Here are the vital statistics:
| Wing Span |
35.8 inches |
| Fuselage Length |
43.3 inches |
| Weight w/o Batt |
3 lbs, 1 ounce |
| Battery |
3300mAh 4-cell lipo |
| Amps |
39 |
| Watts |
600 |